JBoss CentOS 7에 Wildfly 20 설치 및 구성 - 下
페이지 정보
작성자 MiddleM 작성일 20-12-29 13:45 조회 13,700 댓글 0본문
Wildfly 20.0.1 최종버전을 설치할 것이며 다운로드 경로는 아래와 같습니다.
https://download.jboss.org/wildfly/20.0.1.Final/wildfly-20.0.1.Final.zip
|
[root@wildfly20 ~]# wget https://download.jboss.org/wildfly/20.0.1.Final/wildfly-20.0.1.Final.zip --2020-12-28 16:42:47-- https://download.jboss.org/wildfly/20.0.1.Final/wildfly-20.0.1.Final.zip Resolving download.jboss.org (download.jboss.org)... 23.211.117.137, 23.211.117.161, 2600:1410:c000::addf:e35b, ... Connecting to download.jboss.org (download.jboss.org)|23.211.117.137|:443... connected. HTTP request sent, awaiting response... 200 OK Length: 192932490 (184M) [application/zip] Saving to: ‘wildfly-20.0.1.Final.zip’
100%[==============================================================================================>] 192,932,490 33.7MB/s in 5.5s
2020-12-28 16:42:52 (33.5 MB/s) - ‘wildfly-20.0.1.Final.zip’ saved [192932490/192932490] [root@wildfly20 ~]# unzip ./wildfly-20.0.1.Final.zip -d /opt … inflating: /opt/wildfly-20.0.1.Final/modules/system/layers/base/io/jaegertracing/jaeger/main/module.xml inflating: /opt/wildfly-20.0.1.Final/modules/system/layers/base/io/netty/main/netty-all-4.1.48.Final.jar |
2) wildfly 계정 생성
root 사용자로 wildfly를 실행하면 보안에 취약해지므로 새로운 wildfly용 사용자를 만들어줍니다.
|
[root@wildfly20 ~]# useradd -r -d /opt/wildfly/ -s /sbin/nologin wildfly |
자주 사용할 wildfly 디렉토리 경로를 환경변수를 설정해 지정해줍니다.
|
[root@wildfly20 ~]# cat /etc/profile … # Wildfly export WILDFLY_HOME=/opt/wildfly
[root@wildfly20 ~]# source /etc/profile |
압축 해제한 경로가 복잡하므로 심볼릭링크로 링크파일을 생성해줍니다.
[root@wildfly20 ~]# ln -s /opt/wildfly-20.0.1.Final/ /opt/wildfly |
생성해준 wildfly용 계정으로 wildfly 폴더의 소유권 변경해줍니다.
[root@wildfly20 ~]# chown -Rf wildfly: $WILDFLY_HOME |
wildfly를 실행할 수 있는 파일들이 들어있는 bin폴더안에 실행권한을 추가해줍니다.
[root@wildfly20 ~]# chmod +x /opt/wildfly/bin/*.sh |
|
[root@wildfly20 ~]# /opt/wildfly/bin/add-user.sh What type of user do you wish to add? a) Management User (mgmt-users.properties) b) Application User (application-users.properties) (a): a
Enter the details of the new user to add. Using realm 'ManagementRealm' as discovered from the existing property files. Username : wildAdmin Password recommendations are listed below. To modify these restrictions edit the add-user.properties configuration file. - The password should be different from the username - The password should not be one of the following restricted values {root, admin, administrator} - The password should contain at least 8 characters, 1 alphabetic character(s), 1 digit(s), 1 non-alphanumeric symbol(s) Password : wildAdmin WFLYDM0098: The password should be different from the username Are you sure you want to use the password entered yes/no? yes Re-enter Password : wildAdmin What groups do you want this user to belong to? (Please enter a comma separated list, or leave blank for none)[ ]: [click enter] About to add user 'wildAdmin' for realm 'ManagementRealm' Is this correct yes/no? yes … ( 중 략 ) … Is this new user going to be used for one AS process to connect to another AS process? e.g. for a slave host controller connecting to the master or for a Remoting connection for server to server EJB calls. yes/no? yes To represent the user add the following to the server-identities definition <secret value="d2lsZEFkbWlu" /> |
Wildfly를 service로 구성하기 위한 설정을 해줍니다
|
[root@wildfly20 ~]# mkdir -p /etc/wildfly /var/run/wildfly/ [root@wildfly20 ~]# chown wildfly: /var/run/wildfly [root@wildfly20 ~]# cp $WILDFLY_HOME/docs/contrib/scripts/systemd/launch.sh $WILDFLY_HOME/bin/ [root@wildfly20 ~]# cp $WILDFLY_HOME/docs/contrib/scripts/systemd/wildfly.service /etc/systemd/system/ [root@wildfly20 ~]# cp $WILDFLY_HOME/docs/contrib/scripts/systemd/wildfly.conf /etc/wildfly |
관리 콘솔는 외부에서 사용하려면 아래와 같은 설정을 추가해줘야 합니다.
[root@wildfly20 ~]# cat $WILDFLY_HOME/bin/launch.sh … ( 중 략 ) … if [[ "$1" == "domain" ]]; then $WILDFLY_HOME/bin/domain.sh -c $2 -b $3 -bmanagement $4 else $WILDFLY_HOME/bin/standalone.sh -c $2 -b $3 -bmanagement $4 Fi
[root@wildfly20 ~]# cat /etc/systemd/system/wildfly.service … ( 중 략 ) … [Service] Environment=LAUNCH_JBOSS_IN_BACKGROUND=1 EnvironmentFile=-/etc/wildfly/wildfly.conf User=wildfly LimitNOFILE=102642 PIDFile=/var/run/wildfly/wildfly.pid ExecStart=/opt/wildfly/bin/launch.sh $WILDFLY_MODE $WILDFLY_CONFIG $WILDFLY_BIND $WILDFLY_CONSOLE_BIND StandardOutput=null … ( 중 략 ) …
[root@wildfly20 ~]# cat /etc/wildfly/wildfly.conf … ( 중 략 ) … # The console address to bind to WILDFLY_CONSOLE_BIND=0.0.0.0 |
welcome 페이지의 포트인 8080번과 관리 콘솔의 포트인 9990번을 외부에서도 접근할 수 있게 추가해줍니다.
|
[root@wildfly20 ~]# firewall-cmd --permanent --add-port 8080/tcp [root@wildfly20 ~]# firewall-cmd --permanent --add-port 9990/tcp [root@wildfly20 ~]# firewall-cmd --reload |
새로운 service 파일을 적용하기 위해선 daemon을 재시작해주시고 Wildfly를 실행해줍니다.
|
[root@wildfly20 ~]# systemctl daemon-reload [root@wildfly20 ~]# systemctl enable wildfly.service --now [root@wildfly20 ~]# systemctl status wildfly.service -l ● wildfly.service - The WildFly Application Server Loaded: loaded (/etc/systemd/system/wildfly.service; enabled; vendor preset: disabled) Active: active (running) since Tue 2020-12-29 10:38:40 KST; 1min 0s ago Main PID: 788 (launch.sh) Tasks: 59 CGroup: /system.slice/wildfly.service ├─788 /bin/bash /opt/wildfly/bin/launch.sh standalone standalone.xml 0.0.0.0 0.0.0.0 ├─789 /bin/sh /opt/wildfly/bin/standalone.sh -c standalone.xml -b 0.0.0.0 └─866 java -D[Standalone] -server -Xms64m -Xmx512m -XX:MetaspaceSize=96M -XX:MaxMetaspaceSize=256m -Djava.net.preferIPv4Stack=true -Djboss.modules.system.pkgs=org.jboss.byteman -Djava.awt.headless=true -Dorg.jboss.boot.log.file=/opt/wildfly/standalone/log/server.log -Dlogging.configuration=file:/opt/wildfly/standalone/configuration/logging.properties -jar /opt/wildfly/jboss-modules.jar -mp /opt/wildfly/modules org.jboss.as.standalone -Djboss.home.dir=/opt/wildfly -Djboss.server.base.dir=/opt/wildfly/standalone -c standalone.xml -b 0.0.0.0
Dec 29 10:38:40 jbas6 systemd[1]: Started The WildFly Application Server. |
1) Welcome 페이지 확인
http://192.168.101.188:8080에 접속
http://192.168.101.188:8080 에서 Administration Console을 클릭해 접속하시거나
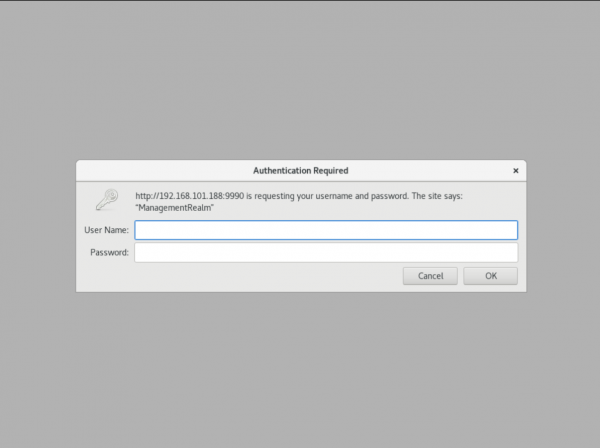
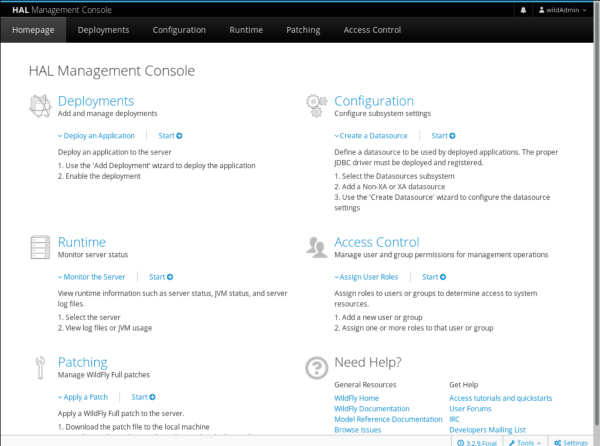
http://192.168.101.188:9990에 접속하시면 되십니다.
로그인은 Username : wildAdmin / Password : wildAdmin 를 입력하시면 됩니다.


댓글목록 0
등록된 댓글이 없습니다.

